在过去多年里,我们在 Go 中写日志的时候,通常都是使用 Zerolog 或者 Zap 这两个包,
在本文中,我们将重点探讨 Go 最近引入的 log/slog 包,该包旨在将高性能、结构化和分级日志记录引入 Go 标准库。
该软件包起源于某位用户在 GitHub 上发起的讨论:structured, leveled logging ,后来演变为描述软件包设计的提案 。经最终确定,该软件包在 Go 1.21 中发布,也就是现在的 log/slog。
slog 旨在提供一个简单的 API,用于记录结构化的、分级的日志。它也可以很容易地与现有的日志记录库集成,例如 Zerolog 和 Zap,这样你就可以在不改变太多现有代码的情况下,使用 slog 来记录日志。(这种情况下,slog 只是作为日志记录库的一个 “前端”。)
在接下来的章节中,我将详细介绍 Slog 提供的内容,并附上示例。
开始使用 Slog
让我们通过对其设计和架构的讲解来开始探索 log/slog 包。它提供了三种主要类型,你应该熟悉:
Logger:记录 “前端”,提供诸如(Info() 和 Error())的级别方法,用于记录感兴趣的事件。Record:由 Logger 创建的每个独立的日志对象的表示。Handler: 一种接口,一旦实现,就确定了每个 Record 的格式和目的地。 log/slog 包中包含两个内置处理程序: TextHandler 和 JSONHandler 分别用于 key=value 和 JSON 输出。
与大多数 Go 日志库一样, slog 包公开了一个默认的 Logger ,可以通过顶层函数访问。这个记录器产生的输出几乎与旧的 log.Printf() 方法完全相同,只是包含了日志级别:
1
2
3
4
5
6
7
8
9
10
11
package mainimport ( "log" "log/slog" ) func main () log.Print("Info message" ) slog.Info("Info message" ) }
输出:
1
2
2024/01/03 10:24:22 Info message 2024/01/03 10:24:22 INFO Info message
这是一个有点奇怪的默认设置,因为 Slog 的主要目的是将结构化日志记录引入标准库。
通过使用 slog.New() 方法创建自定义 Logger 实例来纠正这个问题是相当容易的。它接受 Handler 接口的实现,该接口确定日志的格式和写入位置。
这是一个使用内置 JSONHandler 类型将 JSON 日志输出到 stdout 的示例:
1
2
3
4
5
6
7
func main () logger := slog.New(slog.NewJSONHandler(os.Stdout, nil )) logger.Debug("Debug message" ) logger.Info("Info message" ) logger.Warn("Warning message" ) logger.Error("Error message" ) }
输出:
1
2
3
{"time":"2023-03-15T12:59:22.227408691+01:00","level":"INFO","msg":"Info message"} {"time":"2023-03-15T12:59:22.227468972+01:00","level":"WARN","msg":"Warning message"} {"time":"2023-03-15T12:59:22.227472149+01:00","level":"ERROR","msg":"Error message"}
当使用 TextHandler 类型时,每个日志记录将按照 Logfmt 标准进行格式化:
1 logger := slog.New(slog.NewTextHandler(os.Stdout, nil ))
输出:
1
2
3
time=2023-03-15T13:00:11.333+01:00 level=INFO msg="Info message" time=2023-03-15T13:00:11.333+01:00 level=WARN msg="Warning message" time=2023-03-15T13:00:11.333+01:00 level=ERROR msg="Error message"
所有 Logger 实例默认记录在 INFO 级别,这会导致 DEBUG 条目被抑制,但您可以根据需要轻松更新。
自定义默认记录器
定制默认 Logger 最直接的方法是利用 slog.SetDefault() 方法,允许您用自定义的日志记录器替换默认的日志记录器。
1
2
3
4
5
6
7
func main () logger := slog.New(slog.NewJSONHandler(os.Stdout, nil )) slog.SetDefault(logger) slog.Info("Info message" ) }
您现在会注意到,软件包的顶层日志记录方法现在会生成如下所示的 JSON 输出:
1 {"time":"2023-03-15T13:02:22.227408691+01:00","level":"INFO","msg":"Info message"}
使用 SetDefault() 方法还会改变 log 包使用的默认 log.Logger。这种行为允许利用旧 log 包的现有应用程序无缝过渡到结构化日志记录:
1
2
3
4
5
6
7
8
func main () logger := slog.New(slog.NewJSONHandler(os.Stdout, nil )) slog.SetDefault(logger) log.Println("Hello from old logger" ) }
输出:
1 {"time":"2023-03-15T13:03:22.227408691+01:00","level":"INFO","msg":"Hello from old logger"}
当您需要使用需要后者(例如 http.Server.ErrorLog)的 API 时,也可以使用 slog.NewLogLogger() 方法将 slog.Logger 转换为 log.Logger
1
2
3
4
5
6
7
8
9
10
func main () handler := slog.NewJSONHandler(os.Stdout, nil ) logger := slog.NewLogLogger(handler, slog.LevelError) _ = http.Server{ ErrorLog: logger, } }
将上下文属性添加到日志记录
结构化日志比非结构化格式的一个重要优势是能够在日志记录中添加任意属性作为键值对。
这些属性提供了有关已记录事件的额外上下文,这对于诸如故障排除、生成指标、审计和其他各种目的非常有价值。
这里有一个示例,说明了它在 Slog 中是如何工作的:
1
2
3
4
5
6
7
8
logger.Info( "incoming request" , "method" , "GET" , "time_taken_ms" , 158 , "path" , "/hello/world?q=search" , "status" , 200 , "user_agent" , "Googlebot/2.1 (+http://www.google.com/bot.html)" , )
输出:
1
2
3
4
5
6
7
8
9
10
{ "time":"2023-02-24T11:52:49.554074496+01:00", "level":"INFO", "msg":"incoming request", "method":"GET", "time_taken_ms":158, "path":"/hello/world?q=search", "status":200, "user_agent":"Googlebot/2.1 (+http://www.google.com/bot.html)" }
所有级别方法(Info(),Debug() 等)都接受日志消息作为它们的第一个参数,以及之后无限数量的松散类型的键/值对。
这个 API 类似于 Zap 中的 SugaredLogger API(特别是它的以 w 结尾的级别方法),因为它在追求简洁的同时牺牲了额外的内存分配。
但要小心,因为这种方法可能会导致意想不到的问题。具体来说,不平衡的键/值对可能会导致问题输出:
1
2
3
4
5
logger.Info( "incoming request", "method", "GET", "time_taken_ms", // the value for this key is missing )
由于 time_taken_ms 键没有对应的值,它将被视为具有键 !BADKEY 的值。这并不好,因为属性不对齐可能会产生错误的条目,直到您需要使用日志时才会知道。
输出:
1
2
3
4
5
6
7
{ "time": "2023-03-15T13:15:29.956566795+01:00", "level": "INFO", "msg": "incoming request", "method": "GET", "!BADKEY": "time_taken_ms" }
为了防止这样的问题,您可以运行 vet 命令或使用一个代码检查工具来自动报告这些问题:
1
2
$ go vet . ./main.go:11:2: call to slog.Info missing a final value
另一种防止这种错误的方法是使用如下所示的强类型上下文属性:
1
2
3
4
5
6
7
8
9
10
11
logger.Info( "incoming request" , slog.String("method" , "GET" ), slog.Int("time_taken_ms" , 158 ), slog.String("path" , "/hello/world?q=search" ), slog.Int("status" , 200 ), slog.String( "user_agent" , "Googlebot/2.1 (+http://www.google.com/bot.html)" , ), )
虽然这是一种更好的上下文日志记录方法,但它并非百分之百可靠,因为没有阻止你像这样混合使用强类型和弱类型的键值对:
1
2
3
4
5
6
7
8
9
10
11
logger.Info( "incoming request" , "method" , "GET" , slog.Int("time_taken_ms" , 158 ), slog.String("path" , "/hello/world?q=search" ), "status" , 200 , slog.String( "user_agent" , "Googlebot/2.1 (+http://www.google.com/bot.html)" , ), )
为了确保在向记录添加上下文属性时的类型安全性,您必须像这样使用 LogAttrs() 方法:
1
2
3
4
5
6
7
8
9
10
11
12
13
logger.LogAttrs( context.Background(), slog.LevelInfo, "incoming request" , slog.String("method" , "GET" ), slog.Int("time_taken_ms" , 158 ), slog.String("path" , "/hello/world?q=search" ), slog.Int("status" , 200 ), slog.String( "user_agent" , "Googlebot/2.1 (+http://www.google.com/bot.html)" , ), )
该方法只接受自定义属性的 slog.Attr 类型,因此不可能存在不平衡的键/值对。然而,它的 API 更加复杂,因为您总是需要传递上下文(或 nil )和日志级别到该方法,除了日志消息和自定义属性。
分组上下文属性
Slog 还允许将多个属性分组在一个名称下,但输出取决于使用的 Handler 。例如,使用 JSONHandler ,每个组都嵌套在 JSON 对象中:
1
2
3
4
5
6
7
8
9
10
11
logger.LogAttrs( context.Background(), slog.LevelInfo, "image uploaded" , slog.Int("id" , 23123 ), slog.Group("properties" , slog.Int("width" , 4000 ), slog.Int("height" , 3000 ), slog.String("format" , "jpeg" ), ), )
输出:
1
2
3
4
5
6
7
8
9
10
11
{ "time":"2023-02-24T12:03:12.175582603+01:00", "level":"INFO", "msg":"image uploaded", "id":23123, "properties":{ "width":4000, "height":3000, "format":"jpeg" } }
在使用 TextHandler 时,组中的每个键都将以组名作为前缀,就像这样:
1
2
time=2023-02-24T12:06:20.249+01:00 level=INFO msg="image uploaded" id=23123 properties.width=4000 properties.height=3000 properties.format=jpeg
创建和使用子记录器
在特定范围内的所有记录中包含相同的属性可能有益,可以确保它们的存在,而无需重复的记录语句。
这就是孩子记录器可以发挥作用的地方,因为它们创建了一个新的日志上下文,继承自其父级,同时允许包含额外的字段。
在 Slog 中,使用 Logger.With() 方法可以创建子记录器。它接受一个或多个键/值对,并返回一个包含指定属性的新 Logger 。
考虑以下代码片段,它将程序的进程ID和用于编译的 Go 版本添加到每个日志记录中,并将它们存储在一个 program_info 属性中:
1
2
3
4
5
6
7
8
9
10
11
12
13
14
15
func main () handler := slog.NewJSONHandler(os.Stdout, nil ) buildInfo, _ := debug.ReadBuildInfo() logger := slog.New(handler) child := logger.With( slog.Group("program_info" , slog.Int("pid" , os.Getpid()), slog.String("go_version" , buildInfo.GoVersion), ), ) }
有了这个配置,child 记录器创建的所有记录都将包含指定属性在 program_info 属性下
1
2
3
4
5
6
7
8
9
func main () child.Info("image upload successful" , slog.String("image_id" , "39ud88" )) child.Warn( "storage is 90% full" , slog.String("available_space" , "900.1 mb" ), ) }
输出:
1
2
3
4
5
6
7
8
9
10
11
12
13
14
15
16
17
18
19
20
{ "time": "2023-02-26T19:26:46.046793623+01:00", "level": "INFO", "msg": "image upload successful", "program_info": { "pid": 229108, "go_version": "go1.20" }, "image_id": "39ud88" } { "time": "2023-02-26T19:26:46.046847902+01:00", "level": "WARN", "msg": "storage is 90% full", "program_info": { "pid": 229108, "go_version": "go1.20" }, "available_space": "900.1 MB" }
您还可以使用 WithGroup() 方法创建一个子记录器,以便启动一个组,使所有添加到记录器的属性(包括在日志点添加的属性)都嵌套在组名称下:
1
2
3
4
5
6
7
8
9
10
11
12
13
handler := slog.NewJSONHandler(os.Stdout, nil ) buildInfo, _ := debug.ReadBuildInfo() logger := slog.New(handler).WithGroup("program_info" ) child := logger.With( slog.Int("pid" , os.Getpid()), slog.String("go_version" , buildInfo.GoVersion), ) child.Warn( "storage is 90% full" , slog.String("available_space" , "900.1 MB" ), )
输出:
1
2
3
4
5
6
7
8
9
10
{ "time": "2023-05-24T19:00:18.384136084+01:00", "level": "WARN", "msg": "storage is 90% full", "program_info": { "pid": 1971993, "go_version": "go1.20.2", "available_space": "900.1 mb" } }
自定义 Slog 级别
log/slog 包默认提供了四个日志级别,每个级别都与一个整数值相关联:DEBUG(-4)、INFO(0)、WARN(4) 和 ERROR(8)。
每个级别之间的间隔为 4,这是一个经过深思熟虑的设计决定,以适应具有自定义级别的日志方案。例如,您可以在 INFO 和 WARN 之间创建一个自定义级别,其值为1、2或3。
我们先前观察到,默认情况下,所有记录器都配置为以 INFO 级别记录日志,这会导致记录在更低严重性(如 DEBUG )的事件被抑制。您可以通过以下 HandlerOptions 类型自定义此行为:
1
2
3
4
5
6
7
8
9
10
11
12
13
func main () opts := &slog.HandlerOptions{ Level: slog.LevelDebug, } handler := slog.NewJSONHandler(os.Stdout, opts) logger := slog.New(handler) logger.Debug("Debug message" ) logger.Info("Info message" ) logger.Warn("Warning message" ) logger.Error("Error message" ) }
输出:
1
2
3
4
{"time":"2023-05-24T19:03:10.70311982+01:00","level":"DEBUG","msg":"Debug message"} {"time":"2023-05-24T19:03:10.703187713+01:00","level":"INFO","msg":"Info message"} {"time":"2023-05-24T19:03:10.703190419+01:00","level":"WARN","msg":"Warning message"} {"time":"2023-05-24T19:03:10.703192892+01:00","level":"ERROR","msg":"Error message"}
这种设置级别的方法会在整个生命周期中固定级别。如果需要动态变化的最小级别,必须使用下面所示的类型。
1
2
3
4
5
6
7
8
9
10
11
func main () logLevel := &slog.LevelVar{} opts := &slog.HandlerOptions{ Level: logLevel, } handler := slog.NewJSONHandler(os.Stdout, opts) }
您随时可以使用以下方法更新日志级别:
1 logLevel.Set(slog.LevelDebug)
创建自定义日志级别
如果您需要超出 Slog 默认提供的自定义级别,可以通过实现以下签名的 Leveler 接口来创建它们:
1
2
3
type Leveler interface { Level() Level }
通过下面显示的类型很容易实现这个接口(因为 Level 本身实现了 Leveler):
1
2
3
4
const ( LevelTrace = slog.Level(-8 ) LevelFatal = slog.Level(12 ) )
一旦您按上述方式定义了自定义级别,您只能通过 Log() 或 LogAttrs() 方法使用它们:
1
2
3
4
5
6
7
8
9
opts := &slog.HandlerOptions{ Level: LevelTrace, } logger := slog.New(slog.NewJSONHandler(os.Stdout, opts)) ctx := context.Background() logger.Log(ctx, LevelTrace, "Trace message" ) logger.Log(ctx, LevelFatal, "Fatal level" )
输出:
1
2
{"time":"2023-02-24T09:26:41.666493901+01:00","level":"DEBUG-4","msg":"Trace level"} {"time":"2023-02-24T09:26:41.666602404+01:00","level":"ERROR+4","msg":"Fatal level"}
注意自定义级别是如何以默认级别标记的。这绝对不是你想要的,所以你应该通过 HandlerOptions 类型自定义级别名称,就像这样:
1
2
3
4
5
6
7
8
9
10
11
12
13
14
15
16
17
18
19
20
21
22
23
24
25
26
27
. . . var LevelNames = map [slog.Leveler]string { LevelTrace: "TRACE" , LevelFatal: "FATAL" , } func main () opts := slog.HandlerOptions{ Level: LevelTrace, ReplaceAttr: func (groups []string , a slog.Attr) if a.Key == slog.LevelKey { level := a.Value.Any().(slog.Level) levelLabel, exists := LevelNames[level] if !exists { levelLabel = level.String() } a.Value = slog.StringValue(levelLabel) } return a }, } . . . }
该 ReplaceAttr() 函数用于自定义 Handler 处理 Record 中每个键值对的方式。它可以用于自定义键名,或以某种方式处理值。
在上面的示例中,它将自定义日志级别映射到它们各自的标签,分别生成 TRACE 和 FATAL。
1
2
{"time":"2023-02-24T09:27:51.747625912+01:00","level":"TRACE","msg":"Trace level"} {"time":"2023-02-24T09:27:51.747737319+01:00","level":"FATAL","msg":"Fatal level"}
自定义 Slog 处理程序(Handler)
如前所述,TextHandler 和 JSONHandler 都可以使用 HandlerOptions 类型进行自定义。您已经看到了如何调整最小级别并修改属性以记录它们。
如果需要,可以通过包括日志来源来实现另一种定制化:
1
2
3
4
opts := &slog.HandlerOptions{ AddSource: true , Level: slog.LevelDebug, }
输出:
1
2
3
4
5
6
7
8
9
10
{ "time": "2024-01-03T11:06:50.971029852+01:00", "level": "DEBUG", "source": { "function": "main.main", "file": "/home/ayo/dev/betterstack/demo/slog/main.go", "line": 17 }, "msg": "Debug message" }
根据应用环境轻松切换足够的处理程序也很容易。例如,您可能更喜欢在开发日志中使用 TextHandler ,因为它更容易阅读,然后在生产环境中切换到 JSONHandler ,以获得更灵活性和与各种日志工具的兼容性。
这种行为可以通过环境变量轻松实现:
1
2
3
4
5
6
7
8
9
10
11
12
13
14
15
16
var appEnv = os.Getenv("APP_ENV" )func main () opts := &slog.HandlerOptions{ Level: slog.LevelDebug, } var handler slog.Handler = slog.NewTextHandler(os.Stdout, opts) if appEnv == "production" { handler = slog.NewJSONHandler(os.Stdout, opts) } logger := slog.New(handler) logger.Info("Info message" ) }
输出:
1 time=2023-02-24T10:36:39.697+01:00 level=INFO msg="Info message"
执行:
1 APP_ENV=production go run main.go
输出:
1 {"time":"2023-02-24T10:35:16.964821548+01:00","level":"INFO","msg":"Info message"}
创建自定义处理程序
由于 Handler 是一个接口,可以创建自定义处理程序,以不同的格式格式化日志或将其写入其他目的地。
它的签名如下:
1
2
3
4
5
6
type Handler interface { Enabled(context.Context, Level) bool Handle(context.Context, r Record) error WithAttrs(attrs []Attr) Handler WithGroup(name string ) Handler }
这是每种方法的作用:
Enabled: 根据其级别确定是否处理或丢弃日志记录。也可以使用 context 做出决定。Handle: 处理每个发送到处理程序的日志记录。仅在 Enabled() 返回 true 时调用。WithAttrs: 从现有的处理程序创建一个新的处理程序,并将指定的属性添加到其中。WithGroup: 从现有的处理程序创建一个新的处理程序,并将指定的组名添加到其中,以便该名称限定后续的属性。
这是一个使用 log、json 和 color 包来实现日志记录的美化开发输出的示例:
1 2 3 4 5 6 7 8 9 10 11 12 13 14 15 16 17 18 19 20 21 22 23 24 25 26 27 28 29 30 31 32 33 34 35 36 37 38 39 40 41 42 43 44 45 46 47 48 49 50 51 52 53 54 55 56 57 58 59 60 61 62 63 64 65 66 67 package mainimport ( "context" "encoding/json" "io" "log" "log/slog" "github.com/fatih/color" ) type PrettyHandlerOptions struct { SlogOpts slog.HandlerOptions } type PrettyHandler struct { slog.Handler l *log.Logger } func (h *PrettyHandler) error { level := r.Level.String() + ":" switch r.Level { case slog.LevelDebug: level = color.MagentaString(level) case slog.LevelInfo: level = color.BlueString(level) case slog.LevelWarn: level = color.YellowString(level) case slog.LevelError: level = color.RedString(level) } fields := make (map [string ]interface {}, r.NumAttrs()) r.Attrs(func (a slog.Attr) bool { fields[a.Key] = a.Value.Any() return true }) b, err := json.MarshalIndent(fields, "" , " " ) if err != nil { return err } timeStr := r.Time.Format("[15:05:05.000]" ) msg := color.CyanString(r.Message) h.l.Println(timeStr, level, msg, color.WhiteString(string (b))) return nil } func NewPrettyHandler ( out io.Writer, opts PrettyHandlerOptions, ) h := &PrettyHandler{ Handler: slog.NewJSONHandler(out, &opts.SlogOpts), l: log.New(out, "" , 0 ), } return h }
当你在代码中像这样使用 PrettyHandler 时:
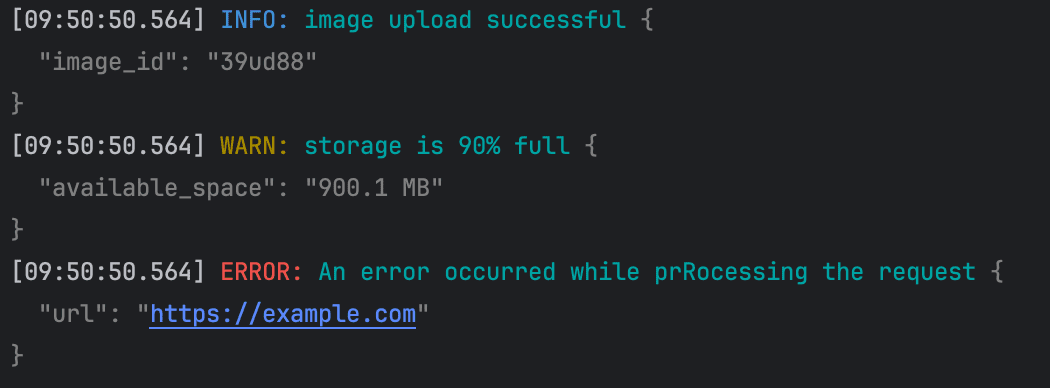
1
2
3
4
5
6
7
8
9
10
11
12
13
14
15
16
17
18
19
20
21
22
func main () opts := PrettyHandlerOptions{ SlogOpts: slog.HandlerOptions{ Level: slog.LevelDebug, }, } handler := NewPrettyHandler(os.Stdout, opts) logger := slog.New(handler) logger.Debug( "executing database query" , slog.String("query" , "SELECT * FROM users" ), ) logger.Info("image upload successful" , slog.String("image_id" , "39ud88" )) logger.Warn( "storage is 90% full" , slog.String("available_space" , "900.1 MB" ), ) logger.Error( "An error occurred while processing the request" , slog.String("url" , "https://example.com" ), ) }
当您执行该程序时,您将观察到以下着色的输出:
使用 Slog 的上下文包
到目前为止,我们主要使用了级别方法的标准变体,比如 Info(),Debug() 等,但 Slog 还提供了接受 context.Context 值作为其第一个参数的上下文感知变体。以下是每个方法的签名:
1 func (ctx context.Context, msg string , args ...any)
通过这种方法,您可以通过将上下文属性存储在 Context 中,在函数之间传播它们,这样当找到这些值时,它们会被添加到任何生成的记录中。
请考虑以下程序:
1
2
3
4
5
6
7
8
9
10
11
12
13
14
15
package mainimport ( "context" "log/slog" "os" ) func main () logger := slog.New(slog.NewJSONHandler(os.Stdout, nil )) ctx := context.WithValue(context.Background(), "request_id" , "req-123" ) logger.InfoContext(ctx, "image uploaded" , slog.String("image_id" , "img-998" )) }
将 request_id 添加到 ctx 变量,并传递给 InfoContext 方法。然而,当程序运行时, request_id 字段不会出现在日志中:
1
2
3
4
5
6
{ "time": "2024-01-02T11:04:28.590527494+01:00", "level": "INFO", "msg": "image uploaded", "image_id": "img-998" }
要使其正常工作,您需要创建一个自定义处理程序,并按照下面所示重新实现 Handle 方法:
1
2
3
4
5
6
7
8
9
10
11
12
13
14
15
16
17
18
19
20
21
22
23
24
25
26
27
28
29
30
31
32
33
34
35
36
37
type ctxKey string const ( slogFields ctxKey = "slog_fields" ) type ContextHandler struct { slog.Handler } func (h ContextHandler) error { if attrs, ok := ctx.Value(slogFields).([]slog.Attr); ok { for _, v := range attrs { r.AddAttrs(v) } } return h.Handler.Handle(ctx, r) } func AppendCtx (parent context.Context, attr slog.Attr) if parent == nil { parent = context.Background() } if v, ok := parent.Value(slogFields).([]slog.Attr); ok { v = append (v, attr) return context.WithValue(parent, slogFields, v) } v := []slog.Attr{} v = append (v, attr) return context.WithValue(parent, slogFields, v) }
该 ContextHandler 结构嵌入了 slog.Handler 接口,并实现了 Handle 方法,以提取存储在提供的上下文中的 Slog 属性。如果找到,它们将被添加到 Record 中,然后调用底层的 Handler 来格式化和输出记录。
另一方面, AppendCtx 函数使用 slogFields 键向 context.Context 添加 Slog 属性,以便 ContextHandler 可访问。
这是如何同时使用它们的方法:
1
2
3
4
5
6
7
8
9
func main () h := &ContextHandler{slog.NewJSONHandler(os.Stdout, nil )} logger := slog.New(h) ctx := AppendCtx(context.Background(), slog.String("request_id" , "req-123" )) logger.InfoContext(ctx, "image uploaded" , slog.String("image_id" , "img-998" )) }
您现在将会观察到,request_id 将包含在使用 ctx 参数创建的任何记录中:
输出:
1
2
3
4
5
6
7
{ "time": "2024-01-02T11:29:15.229984723+01:00", "level": "INFO", "msg": "image uploaded", "image_id": "img-998", "request_id": "req-123" }
使用 Slog 进行错误日志记录
在记录错误时,大多数框架都没有为 error 类型提供辅助程序,因此您必须像这样使用 slog.Any():
1
2
3
err := errors.New("something happened" ) logger.ErrorContext(ctx, "upload failed" , slog.Any("error" , err))
输出:
1
2
3
4
5
6
{ "time": "2024-01-02T14:13:44.41886393+01:00", "level": "ERROR", "msg": "upload failed", "error": "something happened" }
要获取和记录错误堆栈跟踪,您可以使用类似 xerrors 的库来创建带有堆栈跟踪的错误:
1
2
3
err := xerrors.New("something happened" ) logger.ErrorContext(ctx, "upload failed" , slog.Any("error" , err))
在你能够观察错误日志中的堆栈跟踪之前,你还需要提取、格式化并通过之前演示的 ReplaceAttr() 函数将其添加到相应的 Record 中。
这是一个例子:
1
2
3
4
5
6
7
8
9
10
11
12
13
14
15
16
17
18
19
20
21
22
23
24
25
26
27
28
29
30
31
32
33
34
35
36
37
38
39
40
41
42
43
44
45
46
47
48
49
50
51
52
53
54
55
56
57
58
59
60
61
62
63
64
65
66
67
68
69
70
71
72
73
74
75
76
77
78
79
80
81
82
83
84
85
86
87
package mainimport ( "context" "log/slog" "os" "path/filepath" "github.com/mdobak/go-xerrors" ) type stackFrame struct { Func string `json:"func"` Source string `json:"source"` Line int `json:"line"` } func replaceAttr (_ []string , a slog.Attr) switch a.Value.Kind() { case slog.KindAny: switch v := a.Value.Any().(type ) { case error : a.Value = fmtErr(v) } } return a } func marshalStack (err error ) trace := xerrors.StackTrace(err) if len (trace) == 0 { return nil } frames := trace.Frames() s := make ([]stackFrame, len (frames)) for i, v := range frames { f := stackFrame{ Source: filepath.Join( filepath.Base(filepath.Dir(v.File)), filepath.Base(v.File), ), Func: filepath.Base(v.Function), Line: v.Line, } s[i] = f } return s } func fmtErr (err error ) var groupValues []slog.Attr groupValues = append (groupValues, slog.String("msg" , err.Error())) frames := marshalStack(err) if frames != nil { groupValues = append (groupValues, slog.Any("trace" , frames), ) } return slog.GroupValue(groupValues...) } func main () h := slog.NewJSONHandler(os.Stdout, &slog.HandlerOptions{ ReplaceAttr: replaceAttr, }) logger := slog.New(h) ctx := context.Background() err := xerrors.New("something happened" ) logger.ErrorContext(ctx, "image uploaded" , slog.Any("error" , err)) }
有了这个设置,使用 xerrors.New() 创建的任何错误都将被记录为格式良好的堆栈跟踪,如下所示:
1
2
3
4
5
6
7
8
9
10
11
12
13
14
15
16
17
18
19
20
21
22
23
24
25
{ "time": "2024-01-03T07:09:31.013954119+01:00", "level": "ERROR", "msg": "image uploaded", "error": { "msg": "something happened", "trace": [ { "func": "main.main", "source": "slog/main.go", "line": 82 }, { "func": "runtime.main", "source": "runtime/proc.go", "line": 267 }, { "func": "runtime.goexit", "source": "runtime/asm_amd64.s", "line": 1650 } ] } }
现在您可以轻松追踪导致应用程序中任何意外错误的执行路径。
使用 LogValuer 接口隐藏敏感字段
该接口允许您通过指定自定义类型的日志记录方式来标准化日志输出。以下是其签名:
1
2
3
type LogValuer interface { LogValue() Value }
实现此接口的主要用例是隐藏自定义类型中的敏感字段。例如,这是一个未实现该接口的类型。注意当实例被记录时,敏感细节是如何暴露的:
1 2 3 4 5 6 7 8 9 10 11 12 13 14 15 16 17 18 19 20 21 22 23 type User struct { ID string `json:"id"` FirstName string `json:"first_name"` LastName string `json:"last_name"` Email string `json:"email"` Password string `json:"password"` } func main () handler := slog.NewJSONHandler(os.Stdout, nil ) logger := slog.New(handler) u := &User{ ID: "user-12234" , FirstName: "Jan" , LastName: "Doe" , Email: "jan@example.com" , Password: "pass-12334" , } logger.Info("info" , "user" , u) }
输出:
1
2
3
4
5
6
7
8
9
10
11
12
{ "time": "2023-02-26T22:11:30.080656774+01:00", "level": "INFO", "msg": "info", "user": { "id": "user-12234", "first_name": "Jan", "last_name": "Doe", "email": "jan@example.com", "password": "pass-12334" } }
这是有问题的,因为该类型包含不应出现在日志中的秘密字段(如电子邮件和密码),还会使您的日志变得不必要地冗长。
您可以通过指定日志中要表示的类型来解决此问题。例如,您可以指定仅将 ID 字段记录如下:
1 2 3 4 func (u *User) return slog.StringValue(u.ID) }
您现在将观察到以下输出:
1
2
3
4
5
6
{ "time": "2023-02-26T22:43:28.184363059+01:00", "level": "INFO", "msg": "info", "user": "user-12234" }
您也可以像这样对多个属性进行分组:
1
2
3
4
5
6
func (u *User) return slog.GroupValue( slog.String("id" , u.ID), slog.String("name" , u.FirstName+" " +u.LastName), ) }
输出:
1
2
3
4
5
6
7
8
9
{ "time": "2023-03-15T14:44:24.223381036+01:00", "level": "INFO", "msg": "info", "user": { "id": "user-12234", "name": "Jan Doe" } }
使用 Slog 与第三方日志后端
Slog 的主要设计目标之一是为 Go 应用程序提供统一的日志前端(slog.Logger),而后端(slog.Handler)可以根据程序的不同进行定制。
这样一来,即使后端不同,日志记录 API 在所有依赖项中保持一致。这也避免了将日志记录实现与特定包耦合,因为在项目中要求更改时,可以轻松切换到不同的后端。
这是一个使用 Slog 前端和 Zap 后端的示例,可能会提供两全其美的效果:
1
2
go get go.uber.org/zap go get go.uber.org/zap/exp/zapslog
1
2
3
4
5
6
7
8
9
10
11
12
13
14
15
16
17
18
19
20
21
22
23
package mainimport ( "log/slog" "go.uber.org/zap" "go.uber.org/zap/exp/zapslog" ) func main () zapL := zap.Must(zap.NewProduction()) defer zapL.Sync() logger := slog.New(zapslog.NewHandler(zapL.Core(), nil )) logger.Info( "incoming request" , slog.String("method" , "GET" ), slog.String("path" , "/api/user" ), slog.Int("status" , 200 ), ) }
这段代码创建了一个新的 Zap 生产日志记录器,随后被用作 Slog 包的处理程序。有了这个,你只需要使用 slog.Logger 上提供的方法来编写日志,但生成的记录将根据提供的 zapL 配置进行处理。
输出:
1 {"level":"info","ts":1697453912.4535635,"msg":"incoming request","method":"GET","path":"/api/user","status":200}
切换到不同的日志记录非常简单,因为日志记录是根据 slog.Logger 完成的。例如,您可以像这样从 Zap 切换到 Zerolog:
1
2
go get github.com/rs/zerolog go get github.com/samber/slog-zerolog
1
2
3
4
5
6
7
8
9
10
11
12
13
14
15
16
17
18
19
20
21
22
23
24
package mainimport ( "log/slog" "os" "github.com/rs/zerolog" slogzerolog "github.com/samber/slog-zerolog" ) func main () zerologL := zerolog.New(os.Stdout).Level(zerolog.InfoLevel) logger := slog.New( slogzerolog.Option{Logger: &zerologL}.NewZerologHandler(), ) logger.Info( "incoming request" , slog.String("method" , "GET" ), slog.String("path" , "/api/user" ), slog.Int("status" , 200 ), ) }
输出:
1 {"level":"info","time":"2023-10-16T13:22:33+02:00","method":"GET","path":"/api/user","status":200,"message":"incoming request"}
在上面的代码片段中,Zap 处理程序已被自定义的 Zerolog 处理程序替换。由于日志记录不是使用任何库的自定义 API 进行的,迁移过程只需要几分钟,而不是在整个应用程序中切换一个日志记录 API 到另一个的情况。
编写和存储 Go 日志的最佳实践
一旦您配置了 Slog 或您偏爱的第三方 Go 日志框架,就有必要采用以下最佳实践,以确保您充分利用应用程序日志:
1. 标准化您的日志接口
实现 LogValuer 接口可以使您标准化应用程序中各种类型的日志记录,确保它们在日志中的表示在整个应用程序中保持一致。这也是一种有效的策略,可以确保敏感字段不会出现在应用程序日志中,正如我们在本文中之前所探讨的那样。
2. 在错误日志中添加堆栈跟踪
为了提高您在生产环境中调试意外问题的能力,您应该在错误日志中添加堆栈跟踪。这样,就能更容易地确定错误在代码库中的起源位置以及导致问题的程序流程。
Slog 目前没有内置的方法来向错误添加堆栈跟踪,但正如我们之前所演示的,可以使用 pkgerrors 或 go-xerrors 等包以及一些辅助函数来实现这个功能。
3. 对您的 Slog 语句进行检查,以确保一致性
Slog API 的主要缺点之一是它允许两种不同类型的参数,这可能导致代码库中的不一致性。除此之外,您还希望强制执行一致的键名约定(snake_case、camelCase 等),或者确定日志调用是否应始终包括上下文参数。
像 sloglint 这样的 linter 可以帮助您根据您喜欢的代码风格强制执行 Slog 的各种规则。以下是在通过 golangci-lint 使用时的示例配置:
.golangci.yml
1
2
3
4
5
6
7
8
9
10
11
12
13
14
15
16
17
18
19
20
21
22
23
24
25
26
27
linters-settings: sloglint: no-mixed-args: false kv-only: true attr-only: true context-only: true static-msg: true no-raw-keys: true key-naming-case: snake args-on-sep-lines: true
4. 集中管理日志,但首先将它们持久化到本地文件
通常最好将编写日志的任务与将其发送到集中式日志管理系统分离。首先将日志写入本地文件可确保在日志管理系统或网络出现问题时备份,防止关键数据的潜在丢失。比如存储到本地,然后通过阿里云的日志客户端上传到阿里云、又或者通过 Logstash 上传到 Elasticsearch。
此外,在发送日志之前将其存储在本地有助于缓冲日志,从而实现批量传输,有助于优化网络带宽使用,并最大程度减少对应用程序性能的影响。
本地日志存储还提供了更大的灵活性,因此,如果需要转换到不同的日志管理系统,只需要在传输方法中进行修改,而不是整个应用程序日志记录机制。
5. 采样你的日志
日志抽样是仅记录日志条目的代表性子集的做法,而不是每个日志事件都记录。这种技术在高流量环境中非常有益,因为系统会产生大量的日志数据,处理每个条目可能会非常昂贵,因为集中式日志记录解决方案通常根据数据流入速度或存储数据量收费。
1
2
3
4
5
6
7
8
9
10
11
12
13
14
15
16
17
18
19
20
21
22
23
24
25
26
27
package mainimport ( "fmt" "log/slog" "os" slogmulti "github.com/samber/slog-multi" slogsampling "github.com/samber/slog-sampling" ) func main () option := slogsampling.UniformSamplingOption{ Rate: 0.2 , } logger := slog.New( slogmulti. Pipe(option.NewMiddleware()). Handler(slog.NewJSONHandler(os.Stdout, nil )), ) for i := 1 ; i <= 10 ; i++ { logger.Info(fmt.Sprintf("a message from the gods: %d" , i)) } }
输出:
1
2
{"time":"2023-10-18T19:14:09.820090798+02:00","level":"INFO","msg":"a message from the gods: 4"} {"time":"2023-10-18T19:14:09.820117844+02:00","level":"INFO","msg":"a message from the gods: 5"}
6. 使用日志管理服务
将日志集中在日志管理系统中,可以轻松搜索、分析和监控应用程序在多个服务器和环境中的行为。所有日志都集中在一个地方,您可以更快速地识别和诊断问题,不再需要在不同服务器之间跳转以收集有关您的服务的信息。
目前我们使用的是阿里云的日志,但是它的前端性能很差,所以用起来体验较差,优点是部署简单,功能较全。你也可以使用 ElasticSearch 和 Kiabana 来搭建自己的日志系统,但是这个需要自己搭建,成本较高。
总结
在本文中,我们探讨了 Go 语言中日志记录的最佳实践,以及如何使用 Slog 包来实现它们。我们还讨论了如何使用 Slog 与第三方日志后端,以及如何使用 LogValuer 接口标准化日志输出。